

To install CA Certificate, We must configure NTP first (because Certificate has a lifetime)

Click add…and enter the NTP Server (you can go through internet how to make NTP Server, including cisco router)
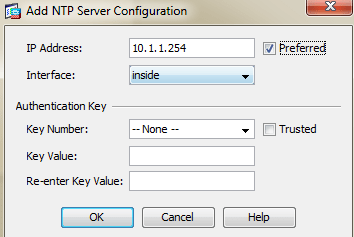
The 10.1.1.254 is my Gateway Router (and My 2nd CA Server…and also my NTP Server)
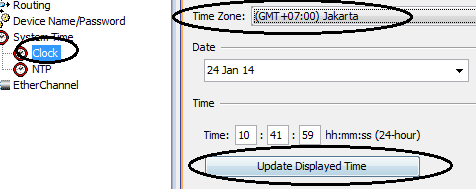
Then go to the Clock…just set the time zone and click update displayed time
================================================
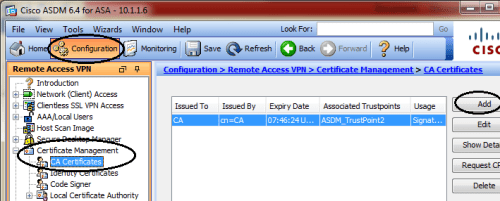
Installing CA into ASA is easy..
Just go to Configuration (Remote Access VPN or Site-to-Site VPN or Device Management)
Go to Configuration > Certificate Management > CA Certificates > click add
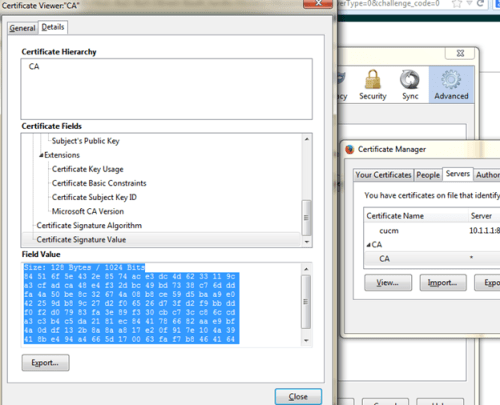
My CA Server name is “CA”… in ASA we can see this in “issued-by CN=CA”
3 ways of inserting CA certificates:
From Downloaded File, Copy Paste the Code, or using SCEP (Simple Certificate Enrollment Protocol)
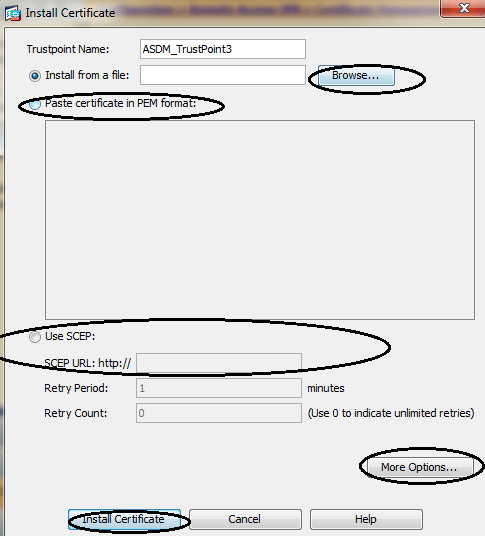
In More Option…we can ignore (do not check) certificate revocation

======================================
inserting CA certificates:
-
1st Way: Download the Certificate and Upload it

-
2nd Way: Copy Paste the whole encryption
-
3rd Way: Or using SCEP (Simple Certificate Enrollment Protocol)
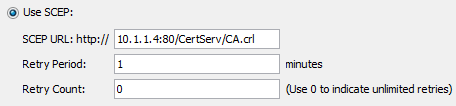
10.1.1.4 is the CA Server (PKI Server using Windows Server 2008)
Then we’re ready

===================================
The Question is, how we create CA Server?!?
There are 3 ways of doing this:
- Using Server Appliance as CA Server(Windows Server)
- Using ASA as CA Server
- Using Router as CA Server
*************
- Windows Server
- Make ASA as CA Server
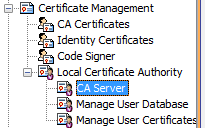
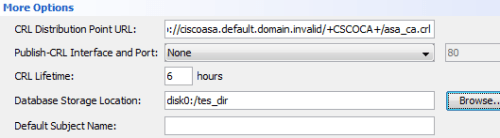
Easy…just go to Certificate Management (same page as adding CA certificates page), then go to Local
Certificate Authority > CA Server
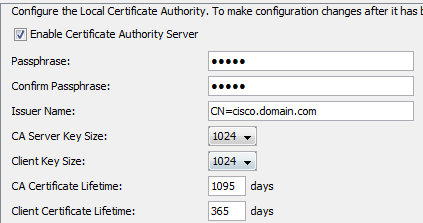
Set passphrase (password if we may say), and another option (Key Size, Lifetime, URL)
- Make Router as CA Server
Reminder, Configure NTP First !!! (in this case my router is the NTP…perform it by typing “ntp master“)
- 1st Step: Create the key (with encryption like RSA/AES) with the name of “CA”, and make it exportable

If we set into 512 bit RSA key, only SSH v1.0 supported…if 1024 bit, the SSH v1.9 is deployed (v1.9 is capable of version 1 and version 2 SSH)
- 2nd Step: Export the key using PEM file format, store it in NVRAM using 3des encyption with passphrase “cisco123”

- 3rd Step: dont forget making our router into http server capable !! (because ASA will retrieve it using port 80 which is http port)

-
4th Step: now we create the PKI Server (CA Server)
- we name the Server “CA” with database pointing into nvram (just like the key)
- then store all the minimum info required info for certificate issuing
- and set the name of issuer using Common Name (CN) “CA”
- also set the lifetime of CA Certificate is 1 year (365 days)
- we name the Server “CA” with database pointing into nvram (just like the key)

- 5th Step: finally…lets bring up this bit*h up with no shut command

Type the password for securing the Certificate Key
